Now that we know the basics of Blazor WebAssembly, we can move on to learning about authentication and authorization. In this article, we are going to explore how to accomplish these actions by inspecting the AuthenticationStateProvider.
We are going to create a test AuthenticationStateProvider to inspect how it works and how to protect our components. Furthermore, we are going to hide our UI from unauthorized users and read the authentication state in the C# code. Later on in the series, we are going to replace the test one with the real AuthenticationStateProvider class.
For the complete navigation for this series, you can visit the Blazor Series page.
Time to start.
Exploring AuthenticationStateProvider in Blazor WebAssembly
Before we start, we have to install the Microsoft.AspNetCore.Components.WebAssembly.Authentication package in the Blazor.Client application:
After the installation, we have to modify the Program.cs class:
builder.Services.AddAuthorizationCore();
With the AddAuthorizationCore method, we are adding authorization service to the IService collection.
Now, let’s create a new folder AuthProviders and inside it a new TestAuthStateProvider class. This file will provide information about the user’s authentication state – whether they are authenticated or not, what are their claims, etc. That said, let’s modify the file:
public class TestAuthStateProvider : AuthenticationStateProvider
{
    public async override Task<AuthenticationState> GetAuthenticationStateAsync()
    {
        var anonymous = new ClaimsIdentity();
        return await Task.FromResult(new AuthenticationState(new ClaimsPrincipal(anonymous)));
    }
}
As you can see, this class inherits from the AuthenticationStateProvider class and implements the GetAuthenticationStateAsync method. Inside this method, we create an anonymous user and return a new authentication state with the new ClaimsPrincipal object accepting the anonymous object.
For this to work, we have to add some additional namespaces:
using Microsoft.AspNetCore.Components.Authorization;
using System.Security.Claims;
If we inspect the ClaimsIdentity constructor, we can see there are ten overloads in total and we can pass the authenticationType parameter, claims or both:
Moreover, if we pass at least the authenticationType, the user won’t be anonymous. That’s why we are using the parameterless constructor – to simulate an anonymous user.
Now, we have to register this class as a service in the Program.cs class:
builder.Services.AddAuthorizationCore();
builder.Services.AddScoped<AuthenticationStateProvider, TestAuthStateProvider>();

await builder.Build().RunAsync();
With this out of the way, we can move on.
Using Authorization Functionalities in the Project
There are three states for Authorization:
- Authorized
- Not-Authorized
- Authorizing
They are pretty self-explanatory and we are going to use them all to see how authorization works in the Blazor project.
To see the authorization in action, we are going to open the App.razor file and modify the RouteView component:
@using BlazorProducts.Client.Pages

<Router AppAssembly="@typeof(Program).Assembly">
    <Found Context="routeData">
        <AuthorizeRouteView RouteData="@routeData" DefaultLayout="@typeof(MainLayout)" />
    </Found>
    <NotFound>
        <LayoutView Layout="@typeof(MainLayout)">
            <CustomNotFound />
        </LayoutView>
    </NotFound>
</Router>
We require the Microsoft.AspNetCore.Components.Authorization namespace for this component to work. So let’s add it to the _Imports.razor file:
@using Microsoft.AspNetCore.Components.Authorization
With the AuthorizeRouteView component, we can access the authentication state information about the current user in any component we can navigate to. So, since we want to have the same information in our components, we are going to wrap up this entire component inside the CascadingAuthenticationState component:
<CascadingAuthenticationState>
    <Router AppAssembly="@typeof(Program).Assembly" PreferExactMatches="@true">
        <Found Context="routeData">
            <AuthorizeRouteView RouteData="@routeData" DefaultLayout="@typeof(MainLayout)" />
        </Found>
        <NotFound>
            <LayoutView Layout="@typeof(MainLayout)">
                <CustomNotFound />
            </LayoutView>
        </NotFound>
    </Router>
</CascadingAuthenticationState>
This component uses the cascading parameters to send information to the components. We have learned about cascading parameters in the second part of this series.
To continue, we are going to modify the TestAuthStateProvider class, by adding some delay before the authentication state provider returns information about the current user:
public async override Task<AuthenticationState> GetAuthenticationStateAsync()
{
    await Task.Delay(1500);

    var anonymous = new ClaimsIdentity();
    return await Task.FromResult(new AuthenticationState(new ClaimsPrincipal(anonymous)));
}
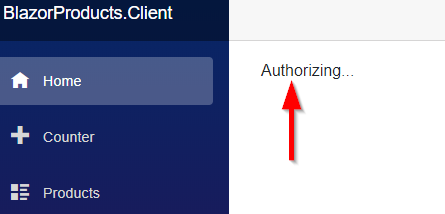
After we start the application, for the second and a half, the Blazor application won’t know whether the user is authorized or not, and we can see the Authorizing message:
We can modify this message, or even show a new view by using the Authorizing component:
<CascadingAuthenticationState>
    <Router AppAssembly="@typeof(Program).Assembly" PreferExactMatches="@true">
        <Found Context="routeData">
            <AuthorizeRouteView RouteData="@routeData" DefaultLayout="@typeof(MainLayout)">
                <Authorizing>
                    <text>Please wait, we are authorizint the user.</text>
                </Authorizing>
            </AuthorizeRouteView>
        </Found>
        <NotFound>
            <LayoutView Layout="@typeof(MainLayout)">
                <CustomNotFound />
            </LayoutView>
        </NotFound>
    </Router>
</CascadingAuthenticationState>
After we start the application one more time we are going to see the new message.
Working with Authorized and NotAuthorized Components
We have seen how to use the Authorizing component in our application, but as we said there are two more states in the authorization process: Authorized and NotAuthorized. For each of these states, we can use a component to show related information or views.
To see this in action, let’s modify the Counter component:
@page "/counter"

<AuthorizeView>
    <Authorized>
        The user is authorized
    </Authorized>
    <NotAuthorized>
        The User is not authorized
    </NotAuthorized>
</AuthorizeView>

<CounterPrint CurrentCount="currentCount" Title="Counter" />
...
Here, we use the AuthorizeView component to display different content depending on the user’s authorization status. The usage of the Authorized and NotAuthorized components is self-explanatory.
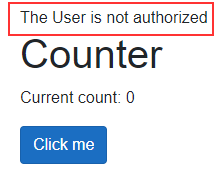
Once we start the application and navigate to the Counter page, we are going to see a not authorized message:
That’s because, in our authentication state provider class, we are using the ClaimsIdentity constructor without a single parameter. Well, let’s change that by adding the claims and the authenticationType parameters:
public async override Task<AuthenticationState> GetAuthenticationStateAsync()
{
    await Task.Delay(1500);
    var claims = new List<Claim>
    {
        new Claim(ClaimTypes.Name, "John Doe"),
        new Claim(ClaimTypes.Role, "Administrator")
    };
    var anonymous = new ClaimsIdentity(claims, "testAuthType");
    return await Task.FromResult(new AuthenticationState(new ClaimsPrincipal(anonymous)));
}
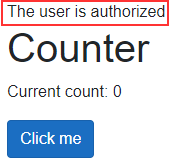
Furthermore, let’s start the application and navigate to the Counter page. We can see a different message, which states, the user is authorized:
Additionally, now that we’ve set up claims, we can use them in our views. To do that, we are going to use the context object on the Counter page:
@page "/counter"
@using System.Security.Claims

<AuthorizeView>
    <Authorized>
        The user: @context.User.FindFirst(ClaimTypes.Name).Value is authorized
    </Authorized>
    <NotAuthorized>
        The User is not authorized
    </NotAuthorized>
</AuthorizeView>
Here, we use the context object to access the User property. From that property, we can extract our claims by using the FindFirst method. The FindFirst method retrieves the first claim it finds, but if we want all the claims that fulfill some kind of condition, we can use the Claims property:
@context.User.Claims.Where("lambda expression goes here");
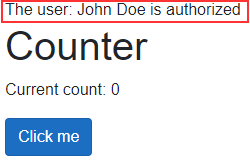
Once we navigate to the Counter page, we are going to see the user’s name in the message:
We can include the Role claims in the whole process if we want. All it takes is to slightly modify the AuthorizeView component:
<AuthorizeView Roles="Administrator">
With this setup, it is not enough for a user to just have the authentication type provided, it must be in an exact role as well. You can play around with this and the role claim in the TestAuthStateProvider class.
Using AuthenticationStateProvider to Protect UI and Components
We can use the same components to protect the UI in our application. For example, we don’t want to allow unauthorized users to see the Products navigation link.
To achieve this, we are going to modify the NavMenu component in the Shared folder:
<div class="@NavMenuCssClass" @onclick="ToggleNavMenu">
    <ul class="nav flex-column">
        ...
        <AuthorizeView>
            <Authorized>
                <li class="nav-item px-3">
                    <NavLink class="nav-link" href="products">
                        <span class="oi oi-list-rich" aria-hidden="true"></span> Products
                    </NavLink>
                </li>
            </Authorized>
        </AuthorizeView>
    </ul>
</div>
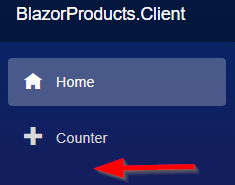
With this in place, as soon as we start our application, we are going to see the Products link because we are authorized. But, after we remove the claims and the authenticationType parameters from the ClaimsIdentity constructor to create an anonymous user:
var anonymous = new ClaimsIdentity();
We won’t be able to see the mentioned link:
Even though we can’t see the menu link, we can still access the page by typing the valid URL. Well, that’s also something we want to prevent.
That said, let’s open the Products.razor file and modify it:
@page "/products"
@using BlazorProducts.Client.Components.ProductTable
@using Microsoft.AspNetCore.Authorization
@attribute [Authorize]
As you can see, all we have to do is to use the Authorize attribute with the @attribute directive and to add a required using directive.
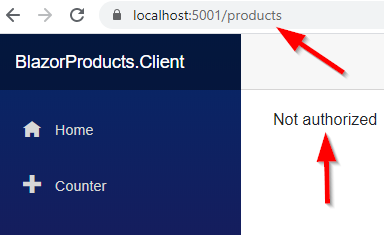
Now, we navigate to the Products page. As a result, we are going to get a not authorized message:
If we want to modify this message, all we have to do is to add a NotAuthorized component in the App.razor file:
<Router AppAssembly="@typeof(Program).Assembly">
    <Found Context="routeData">
        <AuthorizeRouteView RouteData="@routeData" DefaultLayout="@typeof(MainLayout)">
            <Authorizing>
                <text> Please wait, we are authorizing the user. </text>
            </Authorizing>
            <NotAuthorized>
                <text> You are not authorized to access this page. </text>
            </NotAuthorized>
        </AuthorizeRouteView>
    </Found>
    ...
</Router>
Feel free to test this.
Accessing Authentication State in the C# Code
If we want programmatically to execute some actions based on the authentication state of the user, we can do that by using the cascading parameters.
So, let’s open the Counter file and modify the code part:
@code {
    private int currentCount = 0;

    [CascadingParameter]
    public Task<AuthenticationState> AuthState { get; set; }

    private async Task IncrementCount()
    {
        var authState = await AuthState;
        var user = authState.User;

        if (user.Identity.IsAuthenticated)
            currentCount++;
        else
            currentCount--;
    }
}
We use the CascadingParameter attribute to apply the authentication state information to the AuthState property. In the IncrementCount method, we extract the user from the AuthState property and with the Identity.IsAuthenticated property check if the user is authenticated. If that’s true, we increment the currentCount field, otherwise, we decrement it.
Before we test this, let’s just open the CounterPrint component and modify the ShouldRender method to return true.
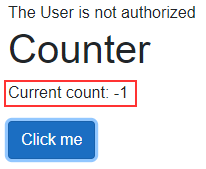
Now, we can start the application and navigate to the Counter page. Since we are not authorized, after clicking the button, the number on the screen will decrease:
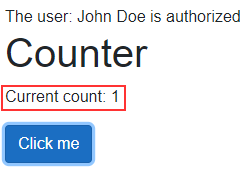
Additionally, as soon as we add the required parameters in the ClaimsIdentity constructor, we are going to be authorized and the counter will increase as soon as we click the button on the Counter page:
Excellent, we did a great job here.
Conclusion
In this article, we have learned:
- How to implement AuthenticationStateProvider in Blazor WebAssembly
- The way to use Authorization functionalities to protect our UIs and Components
- About different type of Authorization components
- And how to access the Authentication State information in the C# code
In the next article, we are going to learn how to implement the User Registration actions with Blazor WebAssembly by using the ASP.NET Core Identity. Additionally, in the articles to come, we are going to replace this test authentication state provider with the real one.


