

In this article, we will take a step further from the previous one by implementing role-based authorization with Keycloak, Blazor WebAssembly, and Web API. If you haven’t read the previous one, I strongly recommend doing that to gain a full picture of the authentication implementation.
By assigning roles to users in Keycloak, we can control access to specific API endpoints and UI elements in the Blazor app. This ensures that only authorized users can perform certain actions, enhancing security and user management.
So, let’s start.
VIDEO: Role-based Authorization With Keycloak, ASP.NET Core Web API and Blazor WASM.
Related Articles: Keycloak Authentication With ASP.NET Core Web API and Blazor WebAssembly · How to Use the REPR Pattern in .NET
Frequently Asked Questions
What is Role-Based Access Control (RBA) with Keycloak?
RBA maps Keycloak roles to application permissions: the Web API authorizes requests by reading realm or client roles from the JWT, and Blazor WebAssembly uses them to gate UI.
How does the ASP.NET Core Web API validate Keycloak roles?
Configure AddAuthentication().AddJwtBearer and use policy or role handlers that inspect the token's realm_access or resource_access role claims.
How does Blazor WebAssembly know the user's roles?
The WASM client reads role claims from the decoded token and uses AuthorizeView/roles or a custom AuthenticationStateProvider to control UI visibility.
Add Roles in Keycloak
In the previous article, we registered a user manually, and for that user, we can manually assign roles.
But first, let’s create some roles.
To do that let’s navigate to the BlazorWebApiRealm realm, and open the “Realm roles” menu:
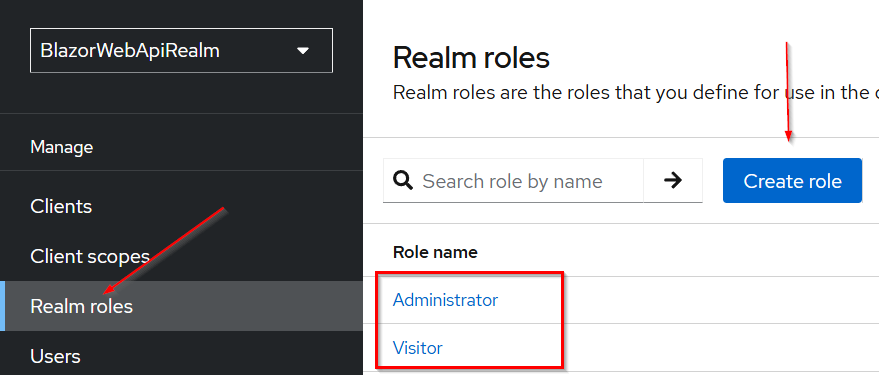
We create two roles, Administrator and Visitor, and for each role, we have to click the Create role button, add the role name, and click the Save button.
Assign a Role to an Existing User in Keycloak
Once we have the required roles, we have to assign the Administrator role to the existing user.
To do that:
- Let’s navigate to the Users menu on the left – as you can see in the previous image the menu is just below the
Realm roles - Select the codemaze user – the one we created in the previous article
- Open the Role mapping tab
- Click the Assign role button
- In a drop-down list select
Filter by realm roles - Choose the
Administratorrole and click theAssignbutton
Enable Automatic Registration in Keycloak
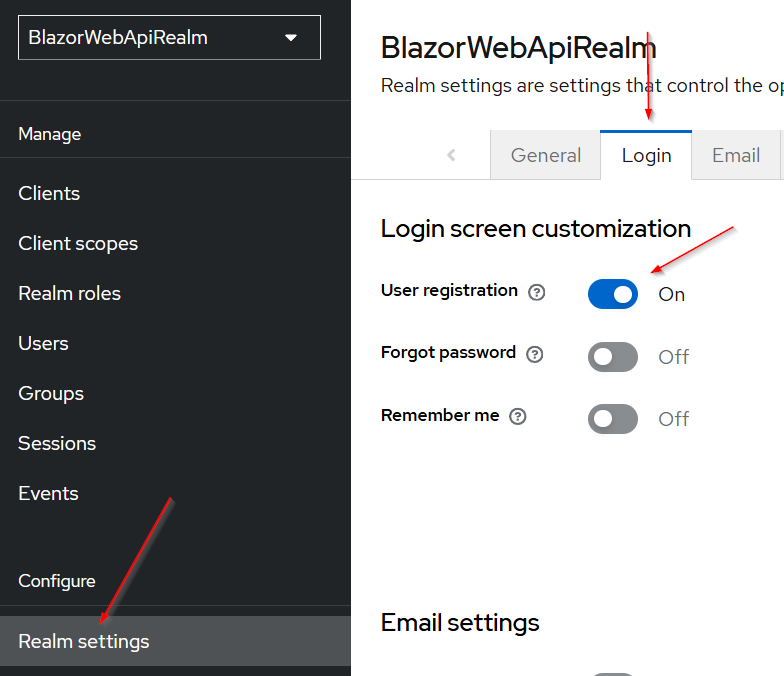
We also want to enable new registered users to get a role assigned automatically. To do that, we need first to enable user registration by:
- Navigating to the Realm settings menu – bit down in the menu on the left
- Open the Login tab
- Check the User registration box (set it to ON)
Also, now, on the same page, we can navigate to the User registration tab (the last tab on the right):
- Click the Assign role button
- Change the DDL to Filter by realm roles
- Select the role we want newly registered users to have by default (the Visitor role)
- Click the
Assignbutton
With this prepared, we assign roles with Keycloak to all registered users.
Test Role Implementation With Keycloak and Blazor WASM
So, let’s run the Blazor app and click the Log in button:
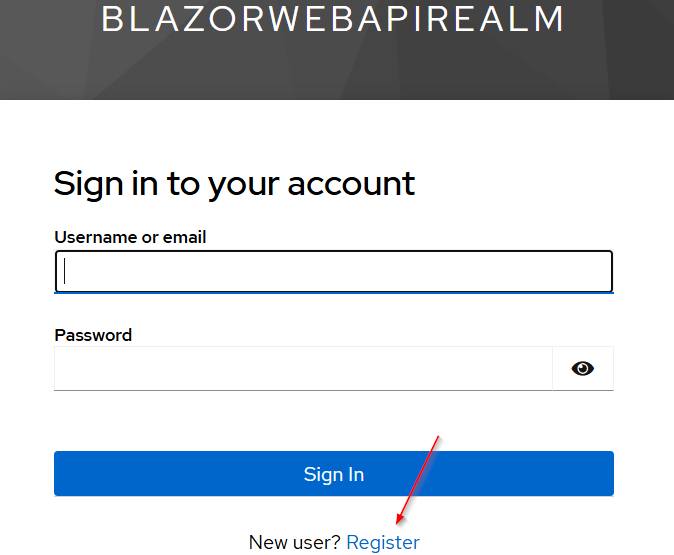
We can see the Register link now, so let’s click on it, and populate the registration form to register a new user. We will register a CodeMazeVisitor user.
Once we do that, the new user will be registered and logged in.
To check if the role is included, we can inspect the application tab of dev tools, and in the session storage find the oidc entry (the same as we did in the previous article). There we can copy the access token and decode it. We should see realm_access with roles:
"realm_access": {
    "roles": [
      "default-roles-blazorwebapirealm",
      "offline_access",
      "uma_authorization",
      "Visitor"
    ]
But, we don’t want that. We want to have a role mapper for this to make it more intuitive.
Mapping Roles in Keycloak For the Blazor WASM App
So, to create a correct mapping, let’s open the Client Scopes menu and find the roles scope, and click on it:
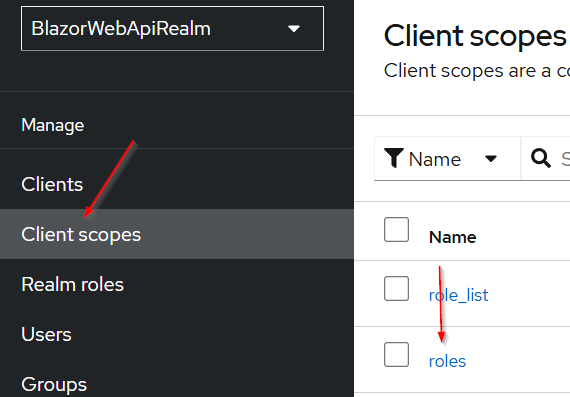
Once we’ve clicked on that scope, we will see a new Roles page with the Settings tab active.
But, we want to:
- Click on the
Mapperstab - Find
realm rolesmapper - Change
Token Claim Nametorole(not roles—Blazor expects role) - Set the
Add to ID Tokencheckbox toYesto include the claim in the ID Token Add to Access TokenandMultivaluedoptions are already set toYes- But we also want to set the
Add to UserInfotoYes - Finally, let’s click the
Savebutton
Again, for each of these options, you have a question mark icon that provides some explanation about that option.
Now to enable roles in the Blazor app, we need to modify the OIDC configuration inside the Program class:
builder.Services.AddOidcAuthentication(options =>
{
    options.ProviderOptions.Authority = "http://localhost:8080/realms/BlazorWebApiRealm";
    options.ProviderOptions.ClientId = "blazor-client";
    options.ProviderOptions.ResponseType = "code";
    options.ProviderOptions.DefaultScopes.Add("blazor_api_scope");
    options.UserOptions.RoleClaim = "role";
});
Because of the mapping, Keycloak stores the roles under the “role” claim, so we are mapping that here.
Now if we log in again and inspect the token:
"role": [
    "default-roles-blazorwebapirealm",
    "offline_access",
    "uma_authorization",
    "Visitor"
  ],
We can see the role claim here with multiple roles as an array of strings.
Using Roles To Protect the Blazor WASM App
Now, we can protect the Weather page to be accessed only by the administrators:
@page "/weather"
@inject HttpClient Http
@using Microsoft.AspNetCore.Authorization
@attribute [Authorize(Roles = "Administrator")]
Also, since we have two users with different roles assigned, we can test this by hiding the Weather menu from the users with the Visitor role inside the NavMenu component:
<AuthorizeView Roles="Administrator">
    <div class="nav-item px-3">
        <NavLink class="nav-link" href="weather">
            <span class="bi bi-list-nested-nav-menu" aria-hidden="true"></span> Weather
        </NavLink>
    </div>
</AuthorizeView>
But, if you log in now (it doesn’t matter which user you use) this still won’t work. We won’t be able to see the Weather menu on the left. That’s because the role claim is an array of strings.
So, we have to work our way around that.
Working With Multiple Roles Inside the Keycloak Role Claim
To be able to parse the role claim from the array of strings to the “single-role-per-claim” claims, we have to create a new class:
public class MultipleRoleClaimsPrincipalFactory<TAccount> : AccountClaimsPrincipalFactory<TAccount>
    where TAccount : RemoteUserAccount
{
    public MultipleRoleClaimsPrincipalFactory(IAccessTokenProviderAccessor accessor)
        : base(accessor)
    {
    }

    public async override ValueTask<ClaimsPrincipal> CreateUserAsync(TAccount account,
        RemoteAuthenticationUserOptions options)
    {
        var user = await base.CreateUserAsync(account, options);
        var claimsIdentity = (ClaimsIdentity)user.Identity;
        if (account != null)
        {
            MapArrayClaimsToMultipleSeparateClaims(account, claimsIdentity);
        }

        return user;
    }

    private static void MapArrayClaimsToMultipleSeparateClaims(TAccount account, ClaimsIdentity claimsIdentity)
    {
        foreach (var prop in account.AdditionalProperties)
        {
            var key = prop.Key;
            var value = prop.Value;
            if (value != null &&
                (value is JsonElement element && element.ValueKind == JsonValueKind.Array))
            {
                claimsIdentity.RemoveClaim(claimsIdentity.FindFirst(prop.Key));
                var claims = element.EnumerateArray()
                    .Select(x => new Claim(prop.Key, x.ToString()));
                claimsIdentity.AddClaims(claims);
            }
        }
    }
}
This class – MultipleRoleClaimsPrincipalFactory<TAccount>, extends AccountClaimsPrincipalFactory<TAccount> to properly handle role claims stored as arrays in Keycloak. By default, Keycloak sends roles in a single claim as an array of strings, but .NET expects each role as a separate claim. This class ensures that each role is added individually to the ClaimsPrincipal.
If you look at the code, you will see it is not that complicated. We just create a user, and if the account exists, we call MapArrayClaimsToMultipleSeparateClaims to transform any array-based claims into multiple individual claims.
Also, we need to call this class in Program:
builder.Services.AddOidcAuthentication(options =>
{
    options.ProviderOptions.Authority = "http://localhost:8080/realms/BlazorWebApiRealm";
    options.ProviderOptions.ClientId = "blazor-client-test";
    options.ProviderOptions.ResponseType = "code";
    options.ProviderOptions.DefaultScopes.Add("blazor_api_scope");
    options.UserOptions.RoleClaim = "role";
}).AddAccountClaimsPrincipalFactory<MultipleRoleClaimsPrincipalFactory<RemoteUserAccount>>();
Now, we can test with the Visitor user – we won’t see the Weather page and won’t be able to access it through URI.
But if we log in as an administrator – we will be able to see the page and the data.
Additionally, we can protect API with the administrator role, and everything will work:
[HttpGet]
[Authorize(Roles = "Administrator")]
public IEnumerable<WeatherForecast> Get()
You can test it again.
Conclusion
By transforming role claims from arrays into individual claims, we ensure proper implementation of roles with Keycloak, Blazor WebAssembly, and .NET Web API. This allows for proper authorization checks and ensures users have the correct permissions. With this setup, role-based access control (RBAC) is fully functional, enhancing security and user management in the application.

