
We have previously learned how to log messages to a File using NLog. In this article, we are going to learn how to use Nlog to log messages into SQL Server.
We are going to see how we can configure an ASP.NET Core Web API project to support NLog and how we can configure NLog using an XML configuration file.
So, let’s start
Creating the Database and Table for Logging
Let’s start by creating the database and a table that will store our log messages. Using SQL Server Management Studio, let’s create our database and name it Nlog. To create the table and columns, right-click on the Nlog database, select New Query and execute the SQL script:

CREATE TABLE Logs(
    Id int NOT NULL PRIMARY KEY IDENTITY(1,1),
    CreatedOn datetime NOT NULL,
    Level nvarchar(10),
    Message nvarchar(max),
    StackTrace nvarchar(max),
    Exception nvarchar(max),
    Logger nvarchar(255),
    Url nvarchar(255)
);
We are creating a Logs table with 8 columns. We are giving each column a name that describes the kind of log message it will store. After executing the script, we are going to have a new table with all the columns in the database:

Creating the Project
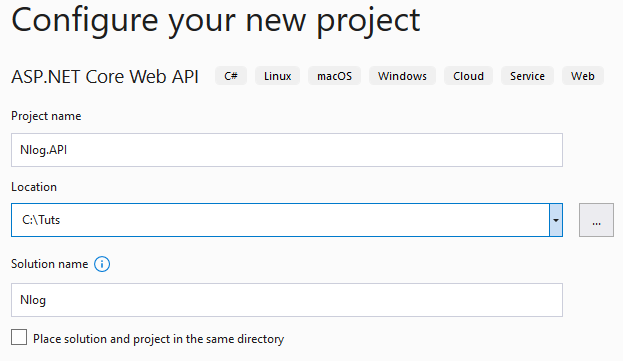
Now let’s create a new ASP.NET Web API project.
Open VS 2019 and select Create a new project, choose ASP.NET Web API and select Next.
Let’s name our project Nlog.API and the solution as Nlog:
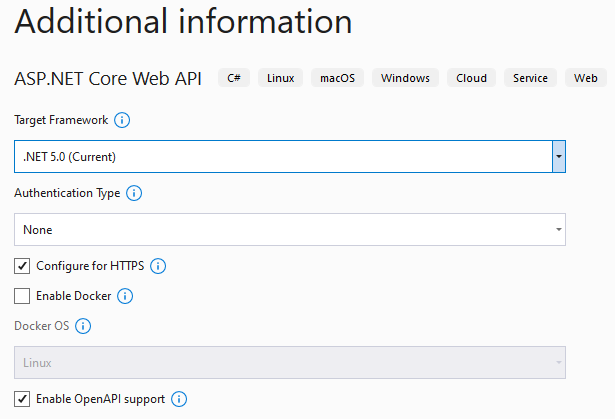
Finally, let’s choose .NET 5.0 as our target framework and select Create:
Installing Packages and Configuring NLog
Using the Nuget Package Manager on Visual Studio, we are going to install these packages:
- NLog 4.7.10
- NLog.Web.AspNetCore 4.13.0
- System.Data.SqlClient 4.8.2

Note:
Not installing the System.Data.SqlClient package will result in this error:Failed to create ConnectionType from DBProvider=sqlserver
Exception: System.IO.FileNotFoundException
Updating Program.cs
Now, let’s update our Program.cs file to set up NLog:
namespace Nlog.API
{
    public class Program
    {
        public static void Main(string[] args)
        {
            var logger = NLogBuilder.ConfigureNLog("nlog.config").GetCurrentClassLogger();

            try
            {
                CreateHostBuilder(args).Build().Run();

            }
            catch (Exception exception)
            {
                logger.Error(exception, "Stopped program because of exception");
                throw;
            }
            finally
            {
                NLog.LogManager.Shutdown();
            }
        }

        public static IHostBuilder CreateHostBuilder(string[] args) =>
            Host.CreateDefaultBuilder(args)
                .ConfigureWebHostDefaults(webBuilder =>
                {
                    webBuilder.UseStartup<Startup>();
                })
                .ConfigureLogging(logging =>
                {
                    logging.ClearProviders();
                    logging.SetMinimumLevel(LogLevel.Trace);
                })
                .UseNLog();
    }


}
To start logging, we need to create a Logger instance. Before creating the Logger instance, we are configuring Nlog by passing the configuration file nlog.config which we are going to create in the next section. The GetCurrentClassLogger() method returns the Logger instance with the name of the current class (Nlog.API.Program).
The logging.ClearProviders() method clears the default logging providers added by Host.CreateDefaultBuilder and we are calling UseNLog(), an extension method for IHostBuilder, to register NLog as a logging provider for our entire application and set it up for dependency injection.
Updating appsettings.json
By default, the minimum log level is set to Information in our appsettings.json file. This setting overrides the minimum log level we specify in Program.cs when we call logging.SetMinimumLevel(LogLevel.Trace). Let’s update the Default key in the Logging section of our appsettings.json file. Remember to update any environment-specific appsettings.json file as well:
"Logging": {
    "LogLevel": {
      "Default": "Trace",
      "Microsoft": "Warning",
      "Microsoft.Hosting.Lifetime": "Information"
    }
 }
Creating NLog.config File
Now, let’s create our nlog.config file.
In the project root, let’s create a text file and name it nlog.config:
<?xml version="1.0" encoding="utf-8" ?>
<nlog xmlns="http://www.nlog-project.org/schemas/NLog.xsd"
      xmlns:xsi="http://www.w3.org/2001/XMLSchema-instance"
      autoReload="true"
      internalLogLevel="Trace"
      internalLogFile="C:\Nlog\logs\internalLog.txt">

    <targets>
        <target xsi:type="Database"
      name="dbTarget"
      connectionString="Data Source=localhost;Initial Catalog=Nlog;Integrated Security=true;"
      commandText="INSERT INTO Logs(CreatedOn,Message,Level,Exception,StackTrace,Logger,Url) VALUES (@datetime,@msg,@level,@exception,@trace,@logger,@url)">
            <parameter name="@datetime" layout="${date}" />
            <parameter name="@msg" layout="${message}" />
            <parameter name="@level" layout="${level}" />
            <parameter name="@exception" layout="${exception}" />
            <parameter name="@trace" layout="${stacktrace}" />
            <parameter name="@logger" layout="${logger}" />
            <parameter name="@url" layout="${aspnet-request-url}" />
        </target>
    </targets>

    <rules>
        <logger name="*" minlevel="Trace" writeTo="dbTarget" />
    </rules>
</nlog>
Our configuration file contains a single target and a rule. We create a database target and insert the values that will be stored in our Logs table each time we log a message.
The commandText attribute contains an SQL statement to insert the values. We are not passing the values directly, instead, we are passing parameter names(e.g. @msg) that hold the values. The value associated with each parameter name is what gets returned from the layout attribute. Each layout attribute returns the value of the layout renderer that we pass to it.
${date} and ${logger} are examples of layout renderers that return the current date and time and the logger name respectively.
NLog provides us with several layout renderers. For a full list of all layout renderers, please check here.
Note:
A misspelled name of any of the layout renderers, for example,${trace}instead of${stacktrace}will result in this error:Error parsing layout
Exception: System.ArgumentException: LayoutRenderer cannot be found
Ensure to change the connectionString and internalLogFile path to match yours. The internal log file is useful for debugging NLog.
Writing Logs in the Controller
Using the WeatherForecastController class that was generated for us in the Controller folder, let’s edit it to log messages:
namespace Nlog.API.Controllers
{
    [ApiController]
    [Route("[controller]")]
    public class WeatherForecastController : ControllerBase
    {

        private readonly ILogger<WeatherForecastController> _logger;

        public WeatherForecastController(ILogger<WeatherForecastController> logger)
        {
            _logger = logger;
        }


        [HttpGet]
        public IEnumerable<string> Get()
        {
            _logger.LogDebug("This is a debug message");
            _logger.LogInformation("This is an info message");
            _logger.LogWarning("This is a warning message ");
            _logger.LogError(new Exception(), "This is an error message");

            return new string[] { "Cool", "Weather" };
        }
    }
}
Now let’s launch our application and navigate to https://localhost:5001/weatherforecast.
The page displays an array of two strings: Cool, Weather.
If everything is set up correctly, we should see the log messages stored in the Logs table: 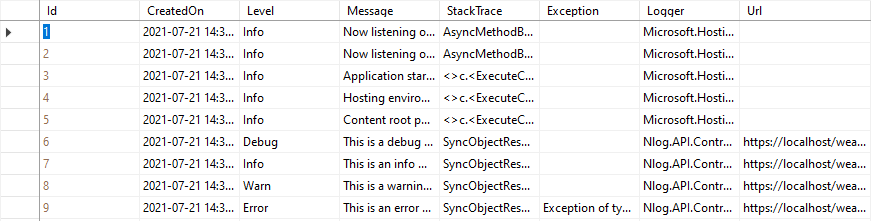
Log messages from Microsoft.Hosting.Lifetime are also stored because of the rule in our configuration file:
<logger name="*" minlevel="Trace" writeTo="dbTarget" />
The wildcard character (*) tells NLog to include all log messages including messages from Microsoft. If we want to skip all log messages from Microsoft and log only our messages, we can change the rule:
<logger name="Microsoft.*" maxlevel="off" final="true" />
<logger name="*" minlevel="Trace" writeTo="dbTarget" />
This rule will discard log messages from Microsoft.Hosting.Lifetime. However, according to the NLog documentation, since we are using only NLog as our logging provider, discarding hosting lifetime startup messages can cause hosting environments such as Docker and Visual studio not to see our application as started.
Lastly, if any error occurs during the setup, NLog logs its errors in the path specified in internalLogFile of our config file. This file helps in debugging.
Conclusion
In this article, we have seen how to configure and use NLog to log messages into SQL Server. To log messages, we learned about creating a database target and using layout renderers provided by NLog as values for our table columns in SQL Server. We also saw how to configure an ASP.NET Core Web API project to use NLog.
Thanks for the sharing excellent information. I have a few queries which would be helpful if you guide
1) How Archival of table is automatically manage if my API is running 24*7 and capturing every request/response log
2) Is there any benchmark of inserting number of records into table
3) Is there any benchmark of number of insert per second
Because In case any log not inserted and same request we have to debug or share with audit team in case of fraud then its risky with such implementation ( If we are not sure )
Good article! Consider adding some info on creating an index on the table for fields that you might be searching or filtering on (date or Level for example).
Hi Tom, thank you.
Thanks for pointing that out as well.
How can we do it in MongoDB 🙂
Hello Lazor,
I haven’t tried connecting NLog with MongoDB but I think you might find this package useful as it provides the needed MongoDB target for NLog.
https://nuget.org/packages/NLog.Mongo
https://github.com/loresoft/NLog.Mongo
Super!
Thanks, Lazor.
Glad you found the article helpful.