

In this article, we’re going to learn how to use the Azure Logic Apps cloud service in detail.
We’ll start by looking at what an Azure Logic App is. Then, we’ll discuss some of its advantages. After that, we’ll learn how to create an Azure Logic App from the portal and configure its Triggers and Actions. Finally, we’ll run the Azure Logic App and verify that it works as expected.
Let’s start by looking at what Azure Logic Apps is all about.

Azure Logic Apps – Intro
Azure Logic Apps is a cloud service with which we can schedule and automate business processes and workflows. This is specifically helpful when we need to integrate apps, data, systems, and services across organizations. Logic Apps simplifies the way we design and build scalable solutions for integrating apps, data, and systems.
For building integration solutions with Azure Logic Apps, we can choose from hundreds of ready-to-use Connectors, which include most of the common Azure services such as App Services, Azure Functions, SQL Server, Azure Storage, etc. Additionally, there are plenty of third-party connectors available for connecting with services like GitHub, Google Drive, Gmail, Twitter, Slack, etc. These connectors provide Triggers and Actions for creating workflows to access these services and process data in real-time:
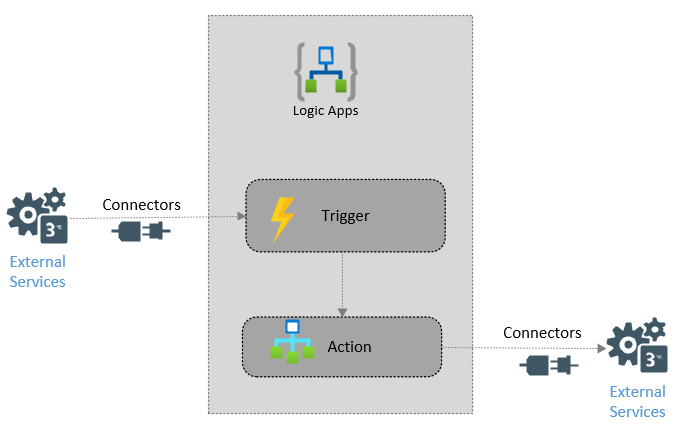
The Logic App workflow starts with a trigger, which fires when a specific event happens or when new data that meets specific criteria is available through a connector to external services. Each time a trigger fires, the Logic Apps engine creates a logic app instance that runs the actions defined in the workflow. Usually, the Logic App executes its actions on some external services using a connector to connect with them. This makes it an excellent tool for integrating our app with external services and orchestrating them.
We can build logic apps visually using the Logic Apps Designer, which is available in the Azure portal. It is also possible to design it using Visual Studio by installing the Azure development workload. In this article, we’ll learn how to create Logic Apps using the Azure portal. If we want to customize the Logic Apps further, it is possible to create or edit logic app definitions in JSON by using the “code view” editor. Finally, we can deploy and run the Logic Apps within the cloud environment.
Azure Logic Apps – Advantages
Now let’s take a look at what advantages Azure Logic Apps brings to the table.
With businesses moving toward digitization, Logic Apps help us connect legacy systems with modern and cutting-edge applications quickly and easily by providing prebuilt APIs as connectors. That way, we can focus more on our app’s business logic and functionality rather than worrying about hosting, scaling, managing, and maintaining them.
While creating Logic Apps, usually there is no need to write code. But if required, there is an option to create code snippets with Azure Functions and run the code on-demand from the Logic Apps.
Azure Logic Apps is one of the most cost-effective Enterprise Integration Platforms (EIA) available in the market today. It makes creating workflows simple with its interactive, drag-and-drop design interface. Being a cloud-based serverless computing service, Logic Apps is flexible on account of its scalability. Furthermore, it provides in-built monitoring for getting historical insights.
Azure Logic Apps offers hundreds of enterprise connectors out of the box and the team keeps on adding new connectors from time to time. If we want to communicate with a service that isn’t available as a pre-built connector or need to connect to our service, we can do that. All we have to do is to go ahead and create a custom connector by defining its triggers and actions to address this scenario. Of course, this is a bit advanced topic, but quite possible.
Creating Azure Logic Apps from the Portal
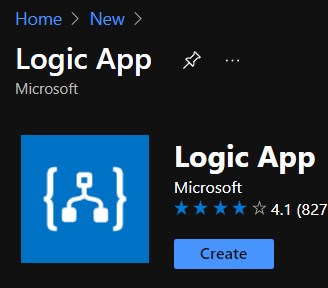
For creating a Logic App from the Azure portal, we can make use of the Logic App template available in the Marketplace:
After selecting the Logic App template, we need to provide a few details for the app:
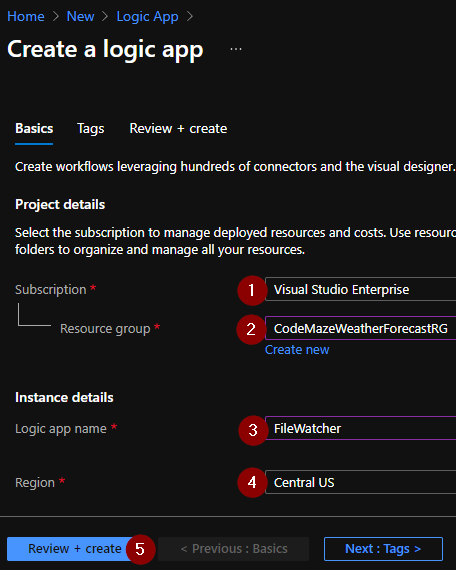
- First, we need to select an existing Subscription.
- Then we need to either select an existing Resource Group or create a new one.
- After that, we need to choose a Name for the Logic App.
- Then, we need to choose a Region.
- Other fields are optional and we can leave those with their default values and proceed to create the Logic App by first clicking on the Review + Create button and then on the Create button.
The portal shows us the step by step progress of the deployment till it is completed:
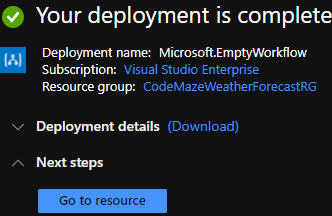
Once the Logic App is created, we can navigate to it by clicking on the Go to resource link.
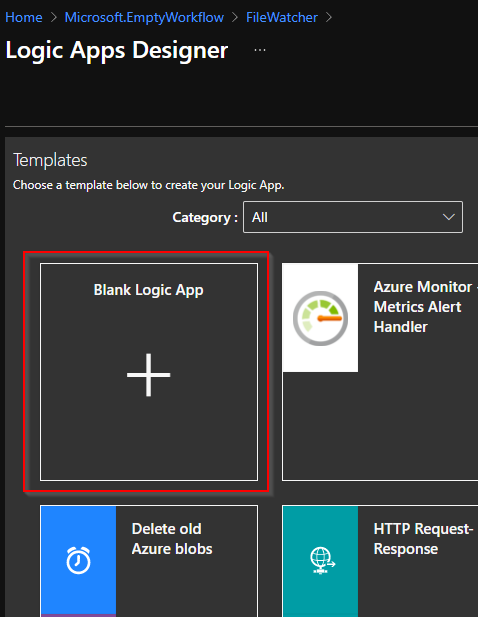
Navigating to the Logic App will land us on the designer screen. There, we can see a list of templates that can help us to create a Logic App quickly. However, in this example, we are going to use the Blank Logic App template as we are planning to build an app from the scratch:
Now it’s time to configure the Triggers and Actions for our app.
Configuring the Trigger
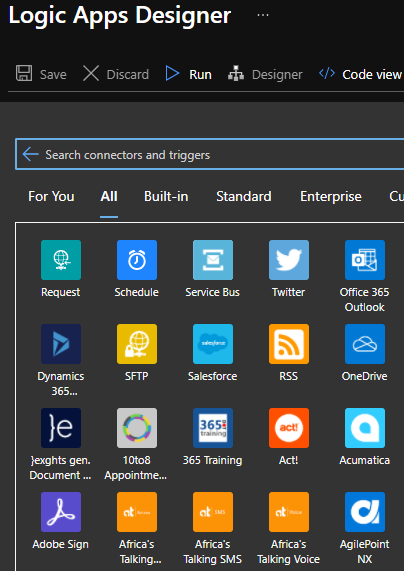
On choosing the Blank Logic App template, we can see a list of all available connectors for creating a trigger:
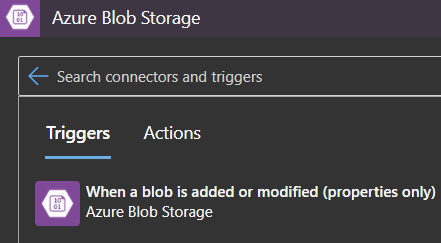
In this example, we are going to implement a trigger that fires when a new file is uploaded to Azure Storage. For that, we need to use the Azure BLOB Storage connector. After searching for the Azure BLOB Storage connector and selecting it, we need to select the When a blob is added or modified trigger:
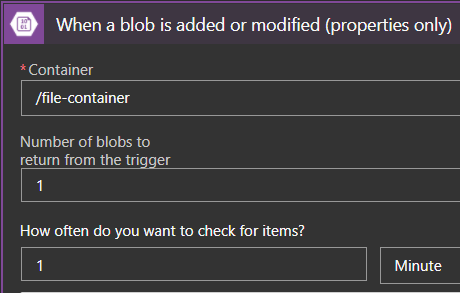
Once we select the trigger, we need to provide the parameters for it.
For configuring an Azure BLOB Storage trigger, we need to have an Azure Storage account in the same subscription. If it is not available, we need to create one. We have explained the process of creating an Azure Storage Account in the Creating Azure Storage section of the Upload Files to Azure with .NET Core Web API and Blazor WebAssembly article.
In case we have multiple storage accounts in the subscription, we need to choose one account and connect to it. After selecting the Storage account, we need to choose the storage Container, and specify the Number of blobs to returned from the trigger and How often to check for new items:
Once we provide these values, we can save the logic app.
Cool!
Our logic app trigger will check if new files are uploaded to the selected BLOB container every minute.
Configuring the Action
The next step is configuring an action for the Logic App. In this example, we are going to use the Office 365 Outlook connector to send an email. We can search for the Office 365 Outlook connector and select it. To start using this connector, we need to have a valid Office 365 account and establish a connection to it by signing in:

After signing in, we can search for Send an email(V2) action:
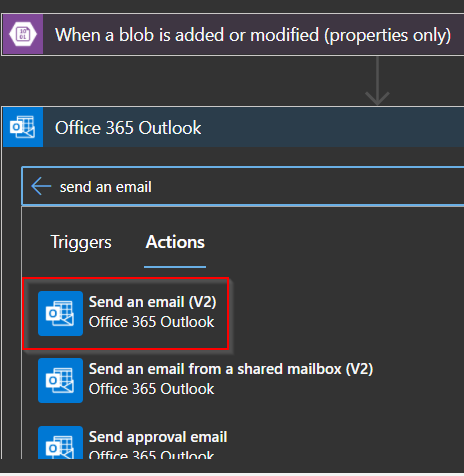
Once we choose the Send an email(V2) action, we need to provide the parameters for it:
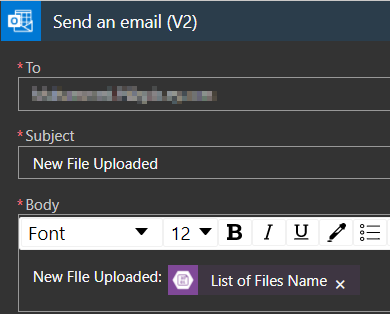
Here we need to provide the details required to send an email like To, Subject, and Body. We have an option to use Dynamic Content from the selected connector if we want to get specific data. Depending on the kind of connector we choose, it will provide us some dynamic content. In this example, we are using the List of Files Name dynamic content which will fetch the name of the uploaded file from the BLOB trigger.
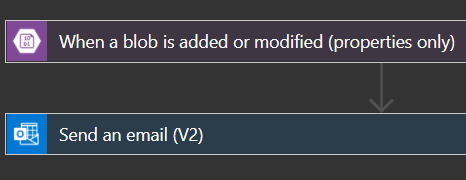
After providing these details, we can save the Logic App once again. The app will now have a BLOB trigger that fires when a new file is uploaded and an Office 365 Outlook Action that sends an email by taking information about the uploaded file:
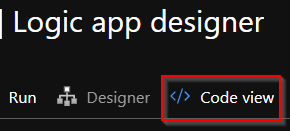
Also, It is possible to edit the code for the Logic App by switching to Code View:
In a code view, we can see JSON based structure that defines the triggers and actions that we create for the Logic App:
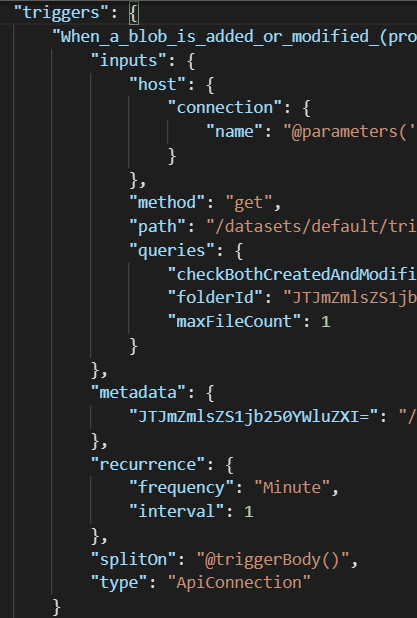
We can create and modify the Logic App in the code view if we prefer that way.
Great!
We have successfully configured the Triggers and Actions for the Logic App. Now it’s time to test it.
Testing Azure Logic Apps
We can run the Logic App by clicking on the Run button in the Logic App designer:
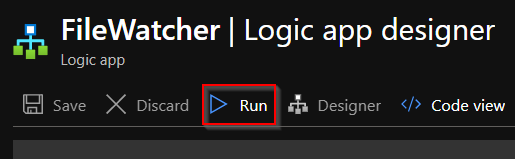
Once we run the Logic App, it will check the trigger for new data in the specified interval. Remember in this example we have specified the interval as 1 minute.
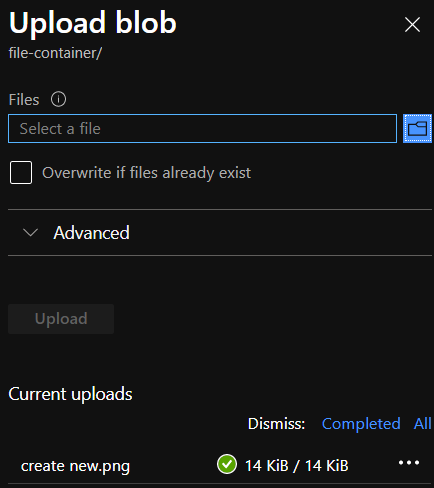
Now, let’s trigger the Logic App by uploading a file to the mapped storage account container:
As soon as the file is uploaded into the BLOB storage, it will trigger the Logic App and the Logic App will execute its action. We can verify this by checking the Runs History tab in the Overview blade of the Azure Logic App:
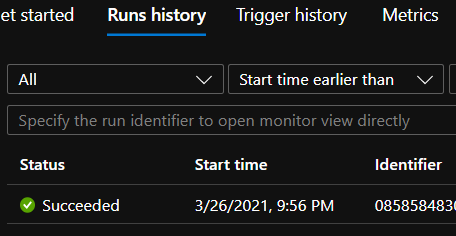
Here what we see is the details of each run like Start time, Duration, Status, etc.
Verifying The Action
We have seen that the Azure Logic App has successfully run, but let’s verify the action of the Logic App. Remember that we had configured the Logic App to send an email when a new file is uploaded to the BLOB storage. Let’s verify if we receive the email. Once we check the inbox, we can see an email with the specified details:
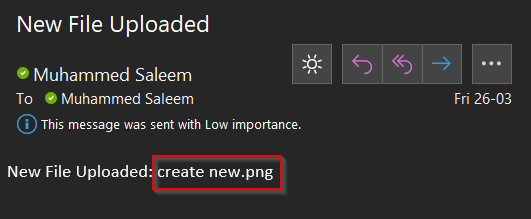
Notice how the file name is extracted and added to the email body as dynamic content.
Cool!
We have verified that the Azure Logic App executes its action perfectly.
It is possible to represent the workflow of the Azure Logic App that we implemented in this example using a simple diagram:
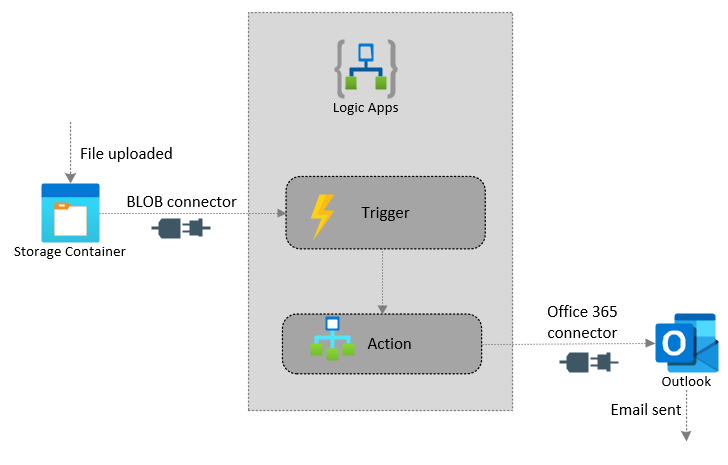
Whenever a new file is uploaded to the storage container, it triggers the Logic App, which executes the action to send an email with details of the uploaded file.
Conclusion
Think about how easily we could create a business workflow using Azure Logic Apps. Imagine how many lines of code we would require for implementing this scenario if we were to develop this solution by writing custom code. First, we would need to connect with a storage account, check for new files in the container at a specified interval, etc. Then once a new file arrives in the storage container, we have to integrate with the email service and extract details of the uploaded file and send the email.
With Logic Apps, we can just configure all these using a simple and easy-to-use designer. Additionally, there are hundreds of connectors available which will help in integrating with most of the commonly used apps and services. Another advantage is that even people without coding expertise, like business users, can create Logic Apps using the designer.
So to sum up, we have learned:
- A lot about the Azure Logic Apps service and its advantages.
- How to create an Azure Logic App From the portal and configuring its Triggers and Actions
- How to run the Azure Logic App from the portal and verifying its Action
Until the next article.