

Up until now, we have covered a lot of ground related to our Blazor WebAssembly application. But, we still have to cover the handling of PUT and DELETE actions in the same application. Ideally, we want to ask our users if they are sure about the Delete action. For that, we are going to show you how to call JavaScript functions in Blazor WebAssembly and implement a confirmation window.
For the complete navigation for this series, you can visit the Blazor Series page.
Let’s start.

Implementing the GetProduct Action in Web API
Before we start with the PUT and DELETE actions, we have to implement an additional action on the Web API’s side. So, let’s start with the IProductRepository interface modification:
public interface IProductRepository
{
    Task<PagedList<Product>> GetProducts(ProductParameters productParameters);
    Task CreateProduct(Product product);
    Task<Product> GetProduct(Guid id);
}
Right after that, we are going to modify the ProductRepository class:
public async Task<Product> GetProduct(Guid id) =>
    await _context.Products.FirstOrDefaultAsync(p => p.Id.Equals(id));
Now, let’s create the GetProduct action in the Products controller:
[HttpGet("{id}")]
public async Task<IActionResult> GetProduct(Guid id)
{
    var product = await _repo.GetProduct(id);
    return Ok(product);
}
That’s it. Feel free to test this to make sure it’s working as expected.
Handling the PUT Request in Blazor WebAssembly and Web API
Let’s start with the server-side implementation.
First, we need to modify the IProductRepository interface:
Task UpdateProduct(Product product, Product dbProduct);
Then, let’s modify the ProductRepository class:
public async Task UpdateProduct(Product product, Product dbProduct)
{
    dbProduct.Name = product.Name;
    dbProduct.Price = product.Price;
    dbProduct.ImageUrl = product.ImageUrl;
    dbProduct.Supplier = product.Supplier;

    await _context.SaveChangesAsync();
}
Additionally, if you are confused about why don’t we use the Update method from the _context object, we strongly recommend reading our EntityFramework Core series or just Modifying Data with EF Core article that is strictly related to this topic.
The last step for the server-side implementation is to create a new UpdateProduct action in the Products controller:
[HttpPut("{id}")]
public async Task<IActionResult> UpdateProduct(Guid id, [FromBody]Product product)
{
    //additional product and model validation checks

    var dbProduct = await _repo.GetProduct(id);
    if (dbProduct == null)
        return NotFound();

    await _repo.UpdateProduct(product, dbProduct);

    return NoContent();
}
Now, let’s test this:
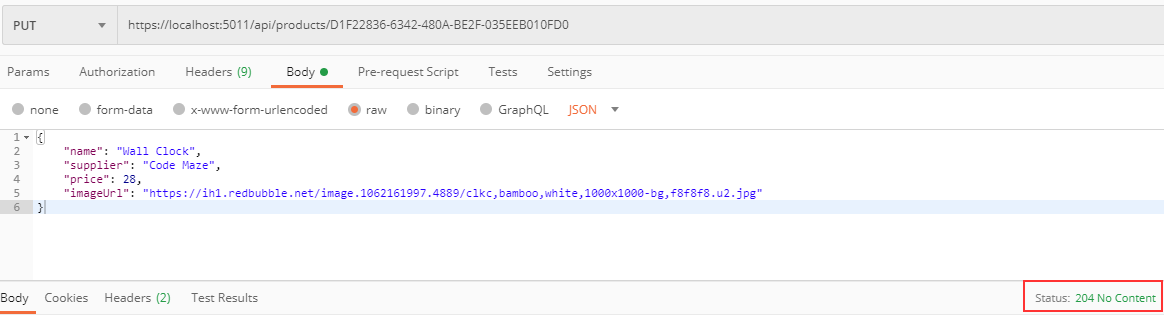
We can see the update is successful. And if we check the logs, we can see that only the price was updated because we changed only that property:

Excellent. Now let’s continue with the Blazor WebAssembly part.
The Client-Side implementation
The first thing we are going to do is to add a new method signature in the IProductHttpRepository interface:
Task<Product> GetProduct(string id);
Task UpdateProduct(Product product);
Next, let’s modify the ProductHttpRepository class:
public async Task<Product> GetProduct(string id)
{
    var url = Path.Combine("products", id);

    var response = await _client.GetAsync(url);
    var content = await response.Content.ReadAsStringAsync();
    if (!response.IsSuccessStatusCode)
    {
        throw new ApplicationException(content);
    }

    var product = JsonSerializer.Deserialize<Product>(content, _options);
    return product;
}
public async Task UpdateProduct(Product product)
{
    var content = JsonSerializer.Serialize(product);
    var bodyContent = new StringContent(content, Encoding.UTF8, "application/json");
    var url = Path.Combine("products", product.Id.ToString());

    var putResult = await _client.PutAsync(url, bodyContent);
    var putContent = await putResult.Content.ReadAsStringAsync();

    if (!putResult.IsSuccessStatusCode)
    {
        throw new ApplicationException(putContent);
    }
}
As you can see, these are pretty straightforward methods and there is nothing we haven’t seen in the previous articles of this series.
Now, let’s create the UpdateProduct component files in the Pages folder.
We are going to modify the class file first:
public partial class UpdateProduct
{
    private Product _product;
    private SuccessNotification _notification;

    [Inject]
    IProductHttpRepository ProductRepo { get; set; }
    [Parameter]
    public string Id { get; set; }

    protected async override Task OnInitializedAsync()
    {
        _product = await ProductRepo.GetProduct(Id);
    }

    private async Task Update()
    {
        await ProductRepo.UpdateProduct(_product);
        _notification.Show();
    }

    private void AssignImageUrl(string imgUrl) => _product.ImageUrl = imgUrl;
}
We can see one important difference from the CreateProduct component and that’s the OnInitializedAsync method. By calling it, as soon as our component initializes, we call the GetProduct method from the repository class and populate our _product variable. We have to populate the _product object to assign values to our controls on the Update form. The Update method will trigger as soon as we click the submit button on the form and the AssignImageUrl will do exactly that if we change the product’s picture.
After the class modification, let’s modify the razor file:
@page "/updateProduct/{id}"

<h2>Update Product Form</h2>

@if(_product != null)
{
    <EditForm Model="_product" OnValidSubmit="Update" class="card card-body bg-light mt-5">
        <DataAnnotationsValidator />
        <div class="form-group row">
            <label for="name" class="col-md-2 col-form-label">Name:</label>
            <div class="col-md-10">
                <InputText id="name" class="form-control" @bind-Value="_product.Name" />
                <ValidationMessage For="@(() => _product.Name)" />
            </div>
        </div>

        <div class="form-group row">
            <label for="supplier" class="col-md-2 col-form-label">Supplier:</label>
            <div class="col-md-10">
                <InputText id="supplier" class="form-control" @bind-Value="_product.Supplier" />
                <ValidationMessage For="@(() => _product.Supplier)" />
            </div>
        </div>

        <div class="form-group row">
            <label for="price" class="col-md-2 col-form-label">Price:</label>
            <div class="col-md-10">
                <InputNumber id="price" class="form-control" @bind-Value="_product.Price" />
                <ValidationMessage For="@(() => _product.Price)" />
            </div>
        </div>

        <div class="form-group row">
            <label for="image" class="col-md-2 col-form-label">Image:</label>
            <div class="col-md-10">
                <ImageUpload ImgUrl="@_product.ImageUrl" OnChange="AssignImageUrl" />
            </div>
        </div>

        <div class="row">
            <div class="col-md-12 text-right">
                <button type="submit" class="btn btn-success">Update</button>
            </div>
        </div>
    </EditForm>
    <SuccessNotification @ref="_notification" />
}
So, we use the @page directive to create a route to this page. We can see that this route has an id parameter. This parameter will be automatically assigned to the Id parameter in the class file. Once the _product parameter is populated, we generate the form controls. We use again the EditForm component but this time we pass the Update method for the OnValidSubmit event emitter. The controls are the same as in the CreateProduct form except for the ImageUpload component, where we pass the image URL as well because we already have that information.
Finally, to be able to navigate to this page, we have to modify the ProductTable component file:
<td class="align-middle">
    <button type="button" class="btn btn-info" @onclick="() => RedirectToUpdate(product.Id)">Update</button>
</td>
And the class file:
public partial class ProductTable
{
    [Parameter]
    public List<Product> Products { get; set; }
    [Inject]
    public NavigationManager NavigationManager { get; set; }

    private void RedirectToUpdate(Guid id)
    {
        var url = Path.Combine("/updateProduct/", id.ToString());
        NavigationManager.NavigateTo(url);
    }
}
We just inject the NavigationManager service to be able to navigate to the required page. We’ve learned about this service in the Routing Part of this series.
Testing the Update Actions
Now, let’s start both server and client applications and navigate to the Products page. Then, we can click the update button and see all the fields populated:

Let’s change the price field to 36 and click the Update button:
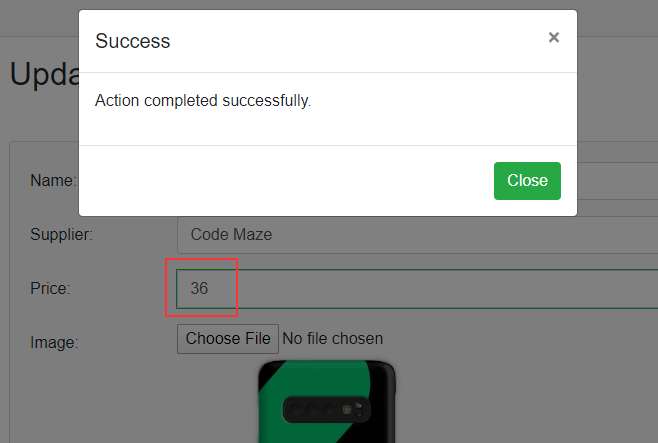
Excellent.
Once we click the close button, we can see our product with the updated price:

So, as we can see, everything is working like a charm.
Now, we can continue with the Delete action.
Delete Action – Web API
Let’s start with the IProductRepository interface modification:
Task DeleteProduct(Product product);
Then, let’s implement this method in the repository class:
public async Task DeleteProduct(Product product)
{
    _context.Remove(product);
    await _context.SaveChangesAsync();
}
And finally, let’s modify the controller:
[HttpDelete("{id}")]
public async Task<IActionResult> DeleteProduct(Guid id)
{
    var product = await _repo.GetProduct(id);
    if (product == null)
        return NotFound();

    await _repo.DeleteProduct(product);

    return NoContent();
}
That’s all it takes. Let’s move on to the client-side.
Delete Action – Blazor WebAssembly
Let’s start with the IProductHttpRepository interface modification:
Task DeleteProduct(Guid id);
And let’s continue with the ProductHttpRepository class:
public async Task DeleteProduct(Guid id)
{
    var url = Path.Combine("products", id.ToString());

    var deleteResult = await _client.DeleteAsync(url);
    var deleteContent = await deleteResult.Content.ReadAsStringAsync();

    if (!deleteResult.IsSuccessStatusCode)
    {
        throw new ApplicationException(deleteContent);
    }
}
Now, in the ProductTable class file, we are going to add a new parameter:
[Parameter]
public EventCallback<Guid> OnDeleted { get; set; }
And to invoke it in the ProductTable component file:
<td class="align-middle">
    <button type="button" class="btn btn-danger" @onclick="() => OnDeleted.InvokeAsync(product.Id)">Delete</button>
</td>
This means that in the parent component, we need to have a method connected to this event callback parameter. So, let’s create it in the Products class file:
private async Task DeleteProduct(Guid id)
{
    await ProductRepo.DeleteProduct(id);
    _productParameters.PageNumber = 1;
    await GetProducts();
}
And of course, we have to modify the Products.razor file:
<div class="row">
    <div class="col">
        <ProductTable Products="ProductList" OnDeleted="DeleteProduct" />
    </div>
</div>
If we try to delete any product at this moment, we will be able to do it. But, we don’t want to allow users to delete a product just like that. We want them to confirm their decision just in case they clicked by accident.
For that, we could create another modal component and use it, but in this case, we are going to show you how to use JavaScript’s confirmation dialog.
JavaScript Functions in Blazor WebAssembly
Using JavaScript functions in Blazor WebAssembly is pretty easy because we have the IJSRuntime service that helps us in the process. By injecting it into the component, we can invoke the JavaScript functions in Blazor WebAssembly. Basically, it represents an instance of a JavaScript runtime to which calls may be dispatched.
Now, let’s see how to use this service in practice.
We are going to start with the ProductTable class file, by injecting the IJSRuntime service:
[Inject]
public IJSRuntime Js { get; set; }
And adding a new method:
private async Task Delete(Guid id)
{
    var product = Products.FirstOrDefault(p => p.Id.Equals(id));

    var confirmed = await Js.InvokeAsync<bool>("confirm", $"Are you sure you want to delete {product.Name} product?");
    if(confirmed)
    {
        await OnDeleted.InvokeAsync(id);
    }
}
We extract the product by its id property from the local Products list. Then, we use the Js property and the InvokeAsync method to call the confirm JavaScript function and pass a parameter to that function. If a user confirms the delete action, we invoke our event callback parameter and execute the method from the parent component.
Now, all we have to do is to modify the @onclick event on the Delete button in the razor file:
<td class="align-middle">
    <button type="button" class="btn btn-danger" @onclick="() => Delete(product.Id)">Delete</button>
</td>
After these changes, we can test our result:
As you can see, we can remove our product only if we confirm our decision.
Great job.
Conclusion
In this article, we have learned how to handle the PUT and DELETE requests on both Web API and Blazor WebAssembly sides. Additionally, we have learned how to use the IJSRuntime service to invoke JavaScript functions in Blazor WebAssembly applications.
In the next article, we are going to learn about AuthenticationStateProvider in Blazor WebAssembly and how to use it for authentication actions.
Hi Marinko,
Thanks for the great series.
Why when I carry out a successful update and navigate back to the products table the table doesn’t reflect the changes however the backend does. I noticed from Dev Tools that the Products page is refreshed using the disk cache. Currently I’m having to perform a hard refresh to see the changes.
Well that is strange since, at least in our example, as soon as we update the product and click that Close button on the modal, we get redirected to the product list page, which fetches new products from the server and render the view for the page. The updated product should be a part of that list.
I was using caching on the backend, turned it off and all is fine.
Excellent tutorials by the way and the book is second to none.
Thanks
I’m glad you fixed the problem. Also thanks a lot for the kind words regarding this tutorial and our book.
Hello,
first of all thank you very much for the articles, everything works well for me,
but I do not understand why with the internet explorer putting for example:
https://localhost:5011/api/products/
It returns data to me, but if I put the same thing in postman it does not return anything and I don’t understand why?
Thank you very much for everything, Víctor.
Hi VIctor. If you have the newest version of Postamn, you should see the logs and verify why the request failed. I really can’t help you more with this information I have. If you still have a problem, you can take picture of the postman with the request and maybe that can help me to help you.
Hi Marinko,
The problem is that in postman to return data in the configuration I have to disable the verification of the SSL certificate, which should be put in the blazor server application to be able to make requests (get, put, delete) with SSL enabled in postman?
best regards, Víctor.