

Sending a GET request to the server-side application and showing the data on the page is just a part of any application. In addition to that, we have to create our data and send POST requests as well. While creating forms, we have to provide validation for a user on that form.
So, creating Blazor WebAssembly forms and their validation is going to be the topic of this article. Additionally, we are going to learn how to use the modal window as a component to display a success message after the create action finishes successfully.
For the complete navigation for this series, you can visit the Blazor Series page.

Let’s start.
Handling the POST action on the Web API’s Side
For our application to work, we need to have a server-side implementation for the POST action. Of course, this will be a basic implementation because this series is not about the Web API logic, it is about the Blazor WebAssembly. So, if you want to learn in great detail about handling POST actions in Web API, we strongly recommend reading our article on that topic.
That said, let’s start with the interface modification:
public interface IProductRepository
{
    Task<PagedList<Product>> GetProducts(ProductParameters productParameters);
    Task CreateProduct(Product product);
}
Then, we have to implement this method in the repository class:
public async Task CreateProduct(Product product)
{
    _context.Add(product);
    await _context.SaveChangesAsync();
}
Finally, we have to add a Create action in the ProductController:
[HttpPost]
public async Task<IActionResult> CreateProduct([FromBody] Product product)
{
    if (product == null)
        return BadRequest();

   //model validation…

    await _repo.CreateProduct(product);

    return Created("", product);
}
And that’s all it takes.
We can send the POST request from Postman:
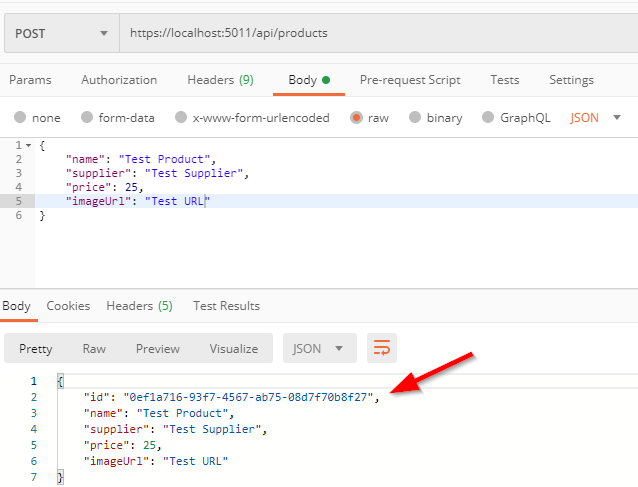
And we can confirm that a new product has been created. Of course, you can check the database as well.
Preparing the POST Request on the Blazor WebAssembly Side
Now that we have prepared the server-side logic, we can continue with the client-side. The first thing we are going to do is to modify the IProductHttpRepository interface:
public interface IProductHttpRepository
{
    Task<PagingResponse<Product>> GetProducts(ProductParameters productParameters);
    Task CreateProduct(Product product);
}
Then, let’s modify the ProductHttpRepository class:
public async Task CreateProduct(Product product)
{
    var content = JsonSerializer.Serialize(product);
    var bodyContent = new StringContent(content, Encoding.UTF8, "application/json");

    var postResult = await _client.PostAsync("products", bodyContent);
    var postContent = await postResult.Content.ReadAsStringAsync();

    if(!postResult.IsSuccessStatusCode)
    {
        throw new ApplicationException(postContent);
    }
}
In this method, we serialize our product object and create a new body content with the StringContent class. Then, we just use the PostAsync method to send the POST request to the server-side application. Additionally, we extract the content from the response. If the response is unsuccessful, we just throw an exception with the postContent variable as a parameter.
Creating Blazor WebAssembly Forms
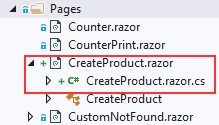
We should be able to navigate to the Product creation page and for that, let’s create it in the Pages folder:
Now, let’s modify the class file:
public partial class CreateProduct
{
    private Product _product = new Product();

    private void Create()
    {

    }
}
Here, we have a private _product variable that we are going to use to bind our values from the form input fields. Also, we have a single Create method to execute when we click the Submit button on the form. We are going to leave it empty for now.
After the class modification, let’s create our form in the CreateProduct razor file. If you are using .NET 6 and above, just use mb-3 class instead of the form-group to keep everything in order:
@page "/createProduct"

<h2>Create Product Form</h2>

<EditForm Model="_product" OnSubmit="Create" class="card card-body bg-light mt-5">
    <div class="form-group row">
        <label for="name" class="col-md-2 col-form-label">Name:</label>
        <div class="col-md-10">
            <InputText id="name" class="form-control" @bind-Value="_product.Name" />
        </div>
    </div>

    <div class="form-group row">
        <label for="supplier" class="col-md-2 col-form-label">Supplier:</label>
        <div class="col-md-10">
            <InputText id="supplier" class="form-control" @bind-Value="_product.Supplier" />
        </div>
    </div>

    <div class="form-group row">
        <label for="price" class="col-md-2 col-form-label">Price:</label>
        <div class="col-md-10">
            <InputNumber id="price" class="form-control" @bind-Value="_product.Price" />
        </div>
    </div>

    <div class="form-group row">
        <label for="image" class="col-md-2 col-form-label">Image:</label>
        <div class="col-md-10">
            <InputText id="image" class="form-control" @bind-Value="_product.ImageUrl" />
        </div>
    </div>

    <div class="row">
        <div class="col-md-12 text-right">
            <button type="submit" class="btn btn-success">Create</button>
        </div>
    </div>
</EditForm>
In this file, we create a route with the @page directive and then our form elements. We use the EditForm component to create our form and this component accepts the Model parameter and the OnSubmit event callback. For the Model parameter, we pass our _product object, and for the OnSubmit event emitter, we provide our Create method. Then, we have a familiar code with bootstrap classes, InputText and InputNumber components. These components help us working with the forms by providing additional styles for valid and invalid controls. Furthermore, Blazor provides us with additional Input components for different input types (InputCheckBox, InputDate, InputSelect…).
Of course, later on in the series, we are going to replace the input text control for the ImageUrl property and implement a file upload functionality for that control.
Calling the Repository Method and Testing the Creation Action
So, now we have to modify our CreateProduct class:
public partial class CreateProduct
{
    private Product _product = new Product();

    [Inject]
    public IProductHttpRepository ProductRepo { get; set; }

    private async Task Create()
    {
        await ProductRepo.CreateProduct(_product);
    }
}
And that’s it. All we have to do is to inject our product repository service and call the CreateProduct method in the Create method.
Now, we can test the solution:
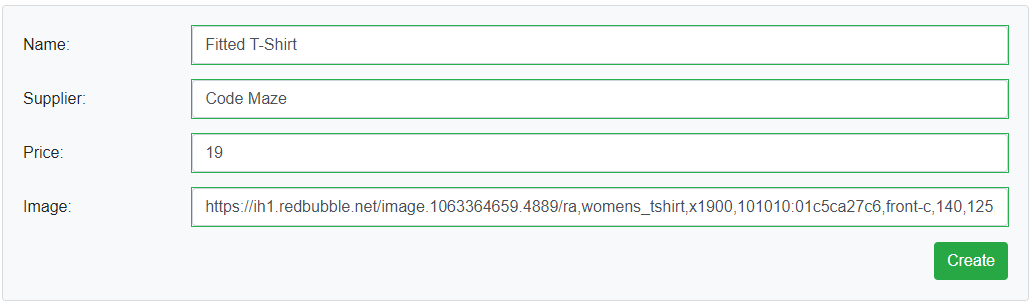
After we click the create button, we can inspect the product page and we are going to find our new product for sure.
Excellent. But far from over.
We need to implement validation for our form and we have to notify the user about the successfully create action. So, let’s continue.
Blazor WebAssembly Forms Validation
To start with the validation process, we have to install the System.ComponentModel.Annotations library in the Entities project:
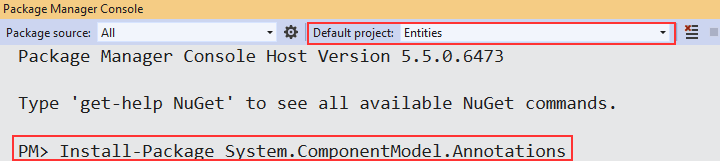
PM> Install-Package System.ComponentModel.Annotations
After that, we have to modify the Product.cs class:
public class Product
{
    public Guid Id { get; set; }
    [Required(ErrorMessage = "Name is required field")]
    public string Name { get; set; }
    [Required(ErrorMessage = "Supplier is required field")]
    public string Supplier { get; set; }
    [Range(1, double.MaxValue, ErrorMessage = "Value for the Price can't be lower than 1")]
    public double Price { get; set; }
    public string ImageUrl { get; set; }
}
Here, we require the Name and the Supplier properties to be populated and we don’t allow the price to be less than 1.
Finally, we have to modify the CreateProduct razor file to add the validation components:
<EditForm Model="_product" OnValidSubmit="Create" class="card card-body bg-light mt-5">
    <DataAnnotationsValidator />
    <div class="form-group row">
        <label for="name" class="col-md-2 col-form-label">Name:</label>
        <div class="col-md-10">
            <InputText id="name" class="form-control" @bind-Value="_product.Name" />
            <ValidationMessage For="@(() => _product.Name)" />
        </div>
    </div>

    <div class="form-group row">
        <label for="supplier" class="col-md-2 col-form-label">Supplier:</label>
        <div class="col-md-10">
            <InputText id="supplier" class="form-control" @bind-Value="_product.Supplier" />
            <ValidationMessage For="@(() => _product.Supplier)" />
        </div>
    </div>

    <div class="form-group row">
        <label for="price" class="col-md-2 col-form-label">Price:</label>
        <div class="col-md-10">
            <InputNumber id="price" class="form-control" @bind-Value="_product.Price" />
            <ValidationMessage For="@(() => _product.Price)" />
        </div>
    </div>

    <div class="form-group row">
        <label for="image" class="col-md-2 col-form-label">Image:</label>
        <div class="col-md-10">
            <InputText id="image" class="form-control" @bind-Value="_product.ImageUrl" />
        </div>
    </div>

    <div class="row">
        <div class="col-md-12 text-right">
            <button type="submit" class="btn btn-success">Create</button>
        </div>
    </div>
</EditForm>
We can see that we change the OnSubmit event emitter to the OnValidSubmit event emitter. With this, our form will send the request – once we click the submit button – only if it’s valid. Then, we add the DataAnnotationsValidator component to help our form understand the rules from the Product.cs class. Finally, we use the ValidationMessage component to show the error message for each input field.
Now, if we try to create a product with invalid data:
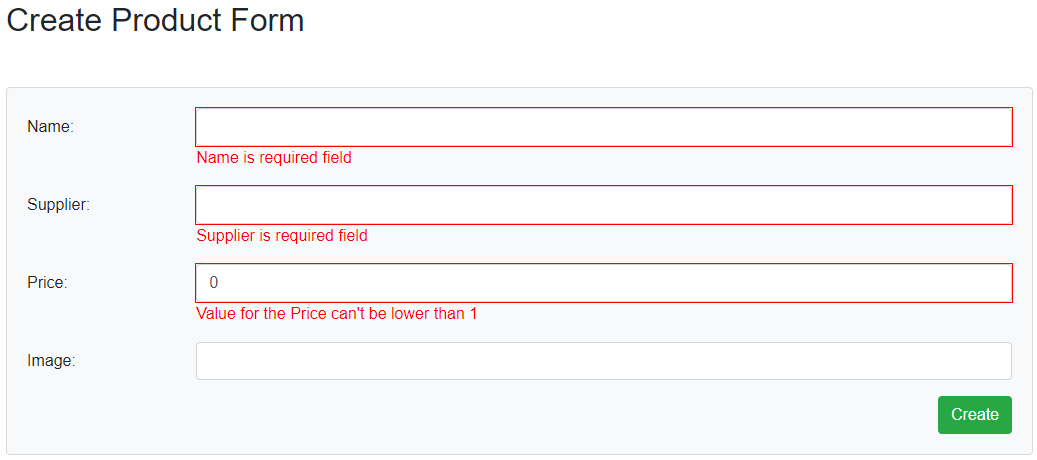
We can see the errors on the screen, and our request is not sent.
One more thing. We are only showing the error messages next to the validated inputs. But, we can show the error summary as well by using the <ValidationSummary /> component. If you want to use it, just place it right below the <DataAnnotationsValidator /> component.
Using Bootstrap Modal for Notifications and @ref Directive
After this implementation, we can finally create a notification component for our CreateProduct component. To do that, we are going to create the SuccessNotification.razor and .cs files in the Shared folder.
Then, let’s modify the razor file first:
<div class="modal @_modalClass" tabindex="-1" role="dialog" style="display:@_modalDisplay">
<div class="modal-dialog" role="document">
<div class="modal-content">
<div class="modal-header">
<h5 class="modal-title">Success</h5>
<button type="button" class="close" @onclick="Hide" aria-label="Close">
<span aria-hidden="true">×</span>
</button>
</div>
<div class="modal-body">
<p>Action completed successfully.</p>
</div>
<div class="modal-footer">
<button type="button" class="btn btn-success" data-dismiss="modal" @onclick="Hide">Close</button>
</div>
</div>
</div>
</div>
@if (_showBackdrop)
{
<div class="modal-backdrop fade show"></div>
}
This is a simple bootstrap code for showing a modal window. Now, we need to create these variables and methods in the class file:
public partial class SuccessNotification
{
    private string _modalDisplay;
    private string _modalClass;
    private bool _showBackdrop;

    [Inject]
    public NavigationManager Navigation { get; set; }

    public void Show()
    {
        _modalDisplay = "block;";
        _modalClass = "show";
        _showBackdrop = true;
        StateHasChanged();
    }

    private void Hide()
    {
        _modalDisplay = "none;";
        _modalClass = "";
        _showBackdrop = false;
        StateHasChanged();
        Navigation.NavigateTo("/products");
    }
}
So, in both methods, we give a value to each of our variables and additionally call the StateHasChanged method. This method notifies a component that the state has changed and forces it to re-render. Additionally, we have injected the NavigationManager service and used it to navigate to the products page.
Now, let’s add this component to the CreateProduct component:
<SuccessNotification @ref="_notification"/>
We can see the @ref directive. This directive enables using the members from the child component inside the parent component. Because we want to show this notification inside the CreateProduct component, we are going to use the _notification variable to call the Show method which resides in the SuccessNotification component.
Finally, we have to modify the CreateProduct class file:
public partial class CreateProduct
{
    private Product _product = new Product();
    private SuccessNotification _notification;

    [Inject]
    public IProductHttpRepository ProductRepo { get; set; }

    private async Task Create()
    {
        await ProductRepo.CreateProduct(_product);
        _notification.Show();
    }
}
In here, we just create the _notification variable of type SuccessNotification and use it inside the Create method to show the notification.
Now, as soon as we create a new product, we are going to see a modal window with the success message:
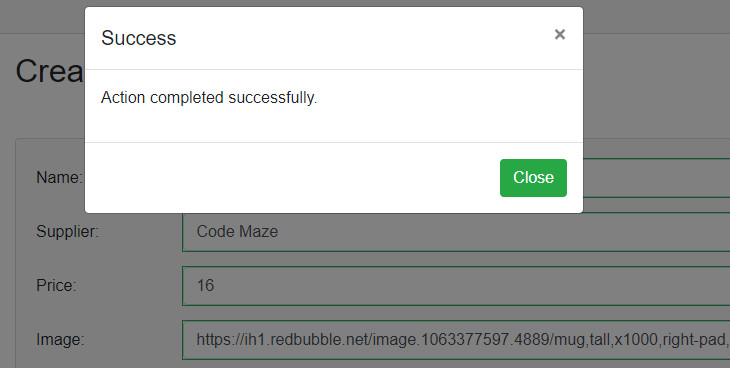
And once we click the Ok button, we are going to be redirected to the Products page.
Conclusion
So, we have learned many different things in this article. From creating the POST request on the server-side and client-side to creating and validating the Blazor WebAssembly forms. Additionally, we have seen how to use the @ref directive to call the members from the child component.
In the next article, we are going to replace the image URL text box with the upload component and will learn how to upload files in Blazor WebAssembly.
Its an easy to understand, and fully functional. Thanks
You are most welcome. Thank you too for the comment.
Could you please explain.
If we have following function in our generic repository
public async Task Create(T entity)
{
await this.RepositoryContext.Set().AddAsync(entity);
await this.RepositoryContext.SaveChangesAsync();
}
Do we need to create following function in our Product Repository
public async Task CreateProduct(Product product)
{
var content = JsonSerializer.Serialize(product);
var bodyContent = new StringContent(content, Encoding.UTF8, “application/json”);
var postResult = await _client.PostAsync(“https://localhost:5011/api/products”, bodyContent);
var postContent = await postResult.Content.ReadAsStringAsync();
if(!postResult.IsSuccessStatusCode)
{
throw new ApplicationException(postContent);
}
}
thanks
Yes, we do. These are two different things. The first one is a generic method on the server side using EF Core to create a new entity to the database. But the second one is the client-side code that sends HTTP request (POST) to the API, which uses that first method to create a new entity.